Glassware
Published over 3 years ago. See the latest and most current information on Glassware.
Gold-standard laboratory hygiene improves safety, efficiency and accuracy across the board. In a clean and hygienic laboratory, personnel can carry out tasks in an organised and efficient manner, while minimising the risk of incidents and accidents. Maintaining laboratory hygiene isn’t difficult, however it does require a strategic approach. In this comprehensive guide we cover everything you need to know about how to set up and maintain a hygienic laboratory.
The first step is to establish best-practice laboratory hygiene protocols. These general housekeeping rules help maintain overall hygiene in facilities of all shapes and sizes, from small-scale university research labs to international R&D centres run by pharmaceutical giants.
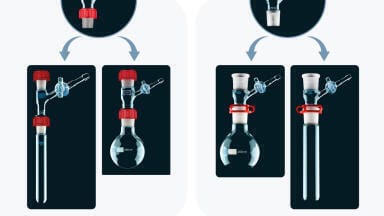
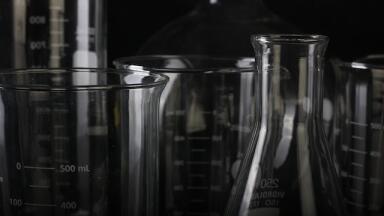
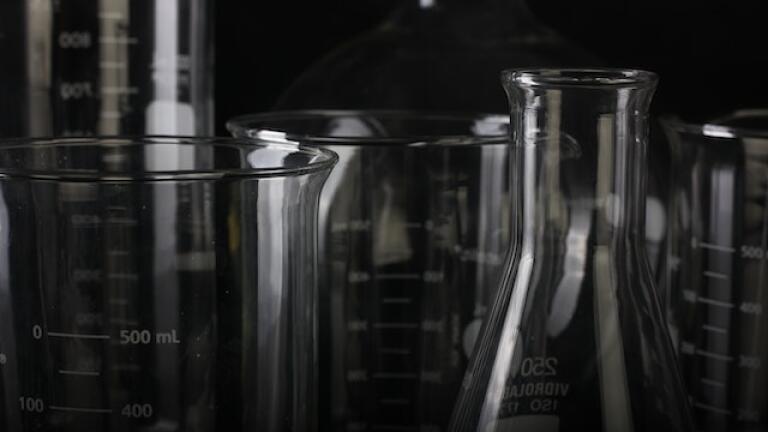
From volumetric flasks to funnels and beakers, glassware is a staple in laboratories - and it's critical to research to keep it clean. Borosilicate glass is coveted in scientific laboratories as it’s durable, heat resistant and won’t crack when exposed to extreme temperature changes. High concentrations of chemicals called boron trioxide and silica give borosilicate glass these unique characteristics.
Generally, it’s best to clean borosilicate glassware immediately after use to avoid stains and degradation. To achieve the best possible results, laboratories should feature with glassware cleaning stations equipped with glass-friendly solvent, distilled water and deionised water.
Below, we take a closer look at cleaning protocols for different types of laboratory glassware:
For simple water-soluble solutions such as sucrose and sodium chloride, simply rinse with deionised water, then repeat two to three times.
Water-insoluble chemicals and compounds such as chloroform and hexane should be rinsed off with a solvent such as ethanol or acetone two to three times. Follow with an additional three to four rinses with deionised water.
Highly concentrated solutions such as Hydrochloric Acid (HCl) and Sulfuric Acid (H2SO4) should be rinsed with tap water under a fume hood. Follow with three to four additional rinses with deionised water.
Like concentrated acids, strong base solutions such as NH4OH and 6M NaOH require a specialised cleaning approach. Carefully rinse glassware with tap water under a fume hood until the base has been removed. Follow with three to four rinses with deionised water.
Weak acids can be rinsed off with deionised water three to four times.
Rinse with tap water to remove the base, then follow with three to four rinses with deionised water.
Many laboratories use specialised laboratory glassware, which must be cleaned using the appropriate steps.
Glassware used for organic chemistry generally needs to be rinsed with a solvent. The type of solvent will depend on the materials used. Water-soluble contents can be rinsed with deionised water while ethanol should be used for ethanol-soluble contents. A brush and hot water can be used to scrub glassware, if necessary. Finish with a thorough rinse in deionised water.
Used for quantitative chemical analysis, burettes are one of the most useful laboratory tools available to scientists. Hot soapy water should be used to clean burettes and remove traces of chemicals and other substances. Each burette should then be rinsed thoroughly with tap water, then rinses again three to four times using deionised water. It’s important to thoroughly clean and dry burettes, as contamination can affect the accuracy of quantitative measurements.
Depending on the type of solution used, glass pipettes and volumetric flasks may need to be soaked overnight in warm soapy water. This helps dissolve chemicals and remove all traces of contaminants. It may also be necessary to scrub the glassware using a bristled brush. Once the cleaning process is complete rinse three to four times with deionised water.
Quartz glass can be soaked in hydrofluoric acid, then rinsed in alcohol or high-purity water.
Air drying glassware on shelves or racks is generally the best way to remove water. Using a paper towel or cloth isn’t recommended as these methods can leave traces of fibres and other contaminants on the glassware. If glassware needs to be used immediately after washing, an acetone rinse can be used to quickly evaporate excess water.
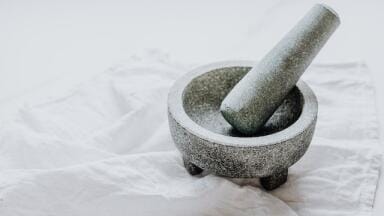
From preparing laboratory samples to crushing chemicals, mortar and pestles are used for a wide range of scientific applications. Strict cleaning protocols are essential, as mortar and pestle sets can be a major source of cross-contamination if materials aren’t properly removed.
Below, we cover some fast, easy and effective steps to keep laboratory mortar and pestle kits clean.
Harder and more durable than glass and porcelain, agate is a popular material for laboratory mortar and pestles. It has an ultra-fine grain structure, which makes it easy to clean and sterilise after use. Black granite is also a coveted material for lab mortar and pestles. Here’s how to clean these types of mortar and pestles and prevent cross-contamination:
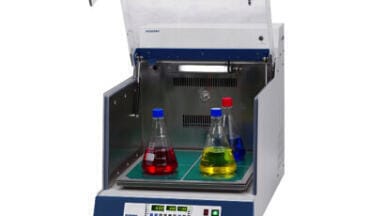
Used to heat samples, laboratory hot plates swap an open flame for a safe and uniform source of heat. They often feature digital displays that make it easy to monitor and control temperatures. Different cleaning protocols may apply, depending on the type of laboratory hot plate being used. Here’s a closer look at some of the most common laboratory hot plates and how to clean them:
From chemicals to clinical samples, hazardous materials are commonplace in laboratories. Workspaces don’t just need to be neat, tidy and well-organised. They also need to be thoroughly disinfected to safeguard laboratory personnel and prevent cross-contamination during research and experiments.
Most surfaces can be cleaned using a mix of 90% water and 10% bleach. Spritz onto countertops and use a clean cloth to wipe surfaces, remembering to cover corners, edges, undersides and other hard-to-reach places.
Hazard assessment is critical when introducing new equipment, instruments, materials or procedures into a laboratory. This step plays an important role in identifying potential hazards and taking steps to minimise risk. For example, a laboratory may identify the need to invest in additional PPE for employees when introducing hazardous chemicals into the facility.
Hazard assessment is one of the main general principles identified in the Harvard University Chemical Hygiene Plan used at laboratories across the prestigious college.
“Prior to initiation of new experiments or procedures, assessment of potential hazards must be performed,” reads the plan. “Appropriate protective measures, including personal protective equipment and engineering controls, must be identified and implemented. Laboratories should develop process- or experiment-specific guidelines and protective procedures.”
From the Mass Spectrometry and Proteomics Resource Laboratory at Harvard University to the European Organisation for Nuclear Research (CERN), laboratory hygiene is a top priority at scientific facilities around the world.
Next-generation technology is continually improving hygiene in scientific laboratories. In the food, agricultural and livestock feed industries, Romer Labs is a global leader in diagnostic solutions. Find out more about the latest developments, including a mobile flow cytometer with the capacity to quantify bacteria and residues on surfaces in 30 seconds, in ‘CytoQuant® - Immediate Verification of Cleaning & Disinfection Procedures’
ILM 51.5 July 2026


.jpg)


-(1).jpg)